 |
Charts -
Printable Lists of
Plants for Your Garden*
The Perfect Perennial
Garden ● pdf
version (Adobe Reader)
*How do
I print these charts?
|
Don't have Adobe Reader?
Click here
 to download a free version!
 |
|
|
 |
Food
Canning and Preservation
How to Can and Preserve Food
|
|
|
 |
Garden Activities
How to Build a Raised Bed
How to Cast Cement Leaves
How to Find Your Nearest Farmers Market
- Oregon
How to Find Your Nearest Farmers Market - Washington
How to Find Your Nearest Farmers Market
- Tri-County Farms
How to
Find a U-Pick Farm - Oregon
How to
Find a U-Pick Farm - Washington
How to Photograph Flowers
& Gardens
How to
Plant a Row for the Hungry
|
|
|
|
 |
Garden Animal
Friends
How to Build a Birds Nest Box
How to
Build a Worm Bin
How to Make Hummingbird Nectar
|
|
|
 |
Lawn care
How to Get Rid of Moss
in Lawns and Gardens
How to Install Drip Irrigation
How to Protect Your Trees from Lawn Mower/Trimmer Damage
How to Tune-up Your Lawn Mower
|
|
|
|
|
One
Weekend Wonders |
 |
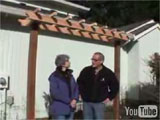
4 Simple Trellises
If you are looking to add height to your garden you can buy something, or you can build a simple trellis yourself! William and Judy walked us through the steps of building a couple of different ones. The first one was easy. William used a tomato cage to help his climbing peas. Judy then showed us the second trellis, which was a simple teepee of bamboo sticks. She tied them at the top and they made a quick and simple structure. The third structure was a folding trellis made from PVC pipe. We cut the pipe into various lengths to fit our garden size. This one had 3, ¾ inch pipes that were 3 feet long. These are for the two base pieces and the top. Then we cut 4 longer pieces (6 foot) these are for the sides. 6 elbows create the square and then we also had 2 tees. The top of the tee was a bigger size than the rest of the pipe. This will allow the folding of the trellis when the season is done. The finishing touch was the string. Last year we used a hemp string for the plants to climb on. This quickly broke down and that meant it didn’t work as well as we had hoped. This year we are using a cotton fiber string, which will give our trellis the strength to give our beans and other climbing plants a good strong base to grow on. The final one was a simple set-up of eyehooks that were screwed into the post on an arbor that we built a couple of weeks ago. Then we ran fishing wire through the hooks to make a structure for the plants to climb on. The fishing wire was invisible to the naked eye and if you are looking for more support you could use a wire, or if you wanted something more ‘earth-friendly’ a hemp string would be good. Give one (or all of them) a try and see if you can get your gardening ‘off the ground’.
* * *
* * *
* * |
 |
Easy Garden Retaining Wall
One of the easiest ways to build a raised bed for your garden is to use Stack Stones from Mutual Materials ( 888-688-8250). They are easy to find, come in different colors and styles, and they look good when you are finished. We met with Ron to get some tips on building a simple retaining wall. First you measure out the area where you want your wall. Then you dig a trench for the base of the wall, this will make the first row of bricks more stable. Next you pour a layer of crushed rock in the trench and tamp it down so it creates a solid base. Starting at the lowest part of the wall, you set your first row of stones in the trench making sure they are level to the ground and to each other. The first base is the most important because it is the basis for the rest of the wall. Once you have that first row done, you can stack the rest of the stones on top. The tongue and grove of the bricks helps hold them in place. If you are looking for a larger wall or you are in need of holding back a large volume of soil you should check out some of the other types of bricks and stones that Mutual Materials has to offer. For ideas and simple how-to instructions you can give them a call or check out their website.
* * * * * * * * |
 |
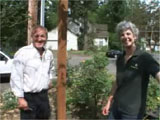
Garden Trellis
People are looking
for more structure in their gardens. One way of doing that is to
build a trellis or arbor. William and Judy showed us a One Weekend
Wonder project on how to build a new trellis with just a few simple
materials. All it took was 2 treated posts, 2 twelve foot 2x4s, 2
bags of concrete, 2 ten foot 2x2s and some nails and bolts. The
project started with the placement of the posts. Once the concrete
was set, we built the top of the trellis. If you are looking for
step by step instructions,
click here**,
for all the details.
**You may need Adobe Reader to
open the instruction file. Click here
to download a free version!
* * *
* * *
* * |
 |
Hypertufa
Pots
Hypertufa
is the art of making lightweight cement pots. Donna Wright from
Black Gold/Sungro gave us the step by step instructions for making
these wonderful pots. Hypertufa means ‘light weight cement pots’ and
she walked William through the process of making them. The 3
ingredients to remember are ‘Peat, Perlite, and Portland Cement’. You
can customize them by adding moss, creating patterns and changing the
color when you make them. It is a great project for families and will
last for years! Check out the recipe if you missed it on the air.
CLICK
HERE FOR THE RECIPE.
* * *
* * *
* * |
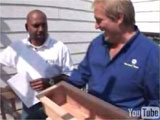 |
Parr Small Planter
As we roll into fall we look at creating colorful planters or making more gardening space closer to your doorstep. Chris Erskine and our friends at
Parr Lumber (503-644-1178) have come up with a
simple plan for a small cedar planter that uses only 2 boards. With a couple of minutes, a hammer, some 5d galvanized nails and a miter saw we were able to construct a planter that will last for years. The best part? It cost less than 10 bucks to build. Chris also recommended that we seal the cedar so it lasts longer and that we drill a couple of drainage holes too. Still, not bad for a simple, quick to assemble planter!
* *
* *
* *
* * |
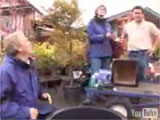 |
Patio Fountain
We bring you another of our One Weekend Wonders, projects that you can tackle in a weekend and are easily done by the time Monday rolls around. This week we went to Tsugawa Nursery (360-225-8750) in Woodland, Wash. to learn how to build a patio fountain. Brian Tsugawa walked Judy through the steps and William put in the labor to build this outstanding feature. The hardest part was waiting for the sealant to dry on the pot. This project requires a container that holds water, a decorative container, piping, a pump and a couple of bricks. Check out the instructions here.
|
|
|
 |
Planting and Care
of
All About Rose Gardening
(Thanks to Kim for suggesting this link!)
How
to Care for Tree Peonies
How to Grow Potatoes
How to Grow Raspberries and Blackberries
How
to Plant and Care for Peonies
How to Plant and Care for Roses
- Heirloom Roses
How to Plant and Care for Roses - Edmunds' Roses
How to Plant and Grow Perennials
How to Plant Vegetable Seeds
(1)
How to Plant Vegetable Seeds
(2)
Nutrient
Deficiencies in Plants
|
|
|
|
 |
Pruning
How to Prune Blueberries
How to Prune Grapes
How to Prune Trees
7 Solutions to the
"Too Big" Rhododendron
PAGE 1
PAGE 2
|
|
|
|
 |
Tree Care
How to Find the Right Tree
How to Look After Your Young Tree
How to Plant a Tree
|