|
COVID-19 AWARENESS: Please note that we are taking all necessary precautions to keep our on-air personalities, interviewees and crew safe during this challenging time. However, we do run repeat stories and segments that were shot earlier this year, before social distancing practices were recommended by health officials. If you see our hosts standing close to someone, please be assured that the segment was shot before March of 2020. We thank you for your concern and your interest in Garden Time.
It is fall and you can feel it in the air. The smoke and cooler weather that we had last week was just a precursor to the fall and most of the plants in the garden responded accordingly. This week we even had to address the changes to your plants due to the recent weather changes. People were a little concerned about what was happening. In this week’s show we share a few reason why it is happening and why you shouldn’t be too concerned.
With fall weather here we also talk about some of the festivals that are changing, and what to do with those tomatoes! Enjoy the rain and start making those fall and winter plans.
This week we featured...
Portland Nursery Apple Tasting Changes
For over 30 years many families have marked the beginning of fall by attending the Annual Apple Tasting at the Portland Nursery on Stark Street. This year, because of the COVID crisis, things are a little different. We met with Ken near a few bins of apples to talk about what they are doing this year. He told us that the festival as we know it is not going to happen. Large crowds and tasting apples with tooth picks is too risky. Still, they want to celebrate the apple and give more people an opportunity to participate. That means that they are stretching out the apple availability for a few more months! Starting now and through November, you can find a huge assortment of apples available at both of their locations for you to purchase and take home for your own private apple tasting. Not sure which varieties to pick? Check out their apple list here. They also have a bunch of apple tips from resident expert Ken! To help people who may have a tight budget, they are also rolling back prices during this time, all apples are only 99 cents a pound! So stop by anytime and pick up some apples and have an apple a day. A perfect fruit for staying healthy this fall.
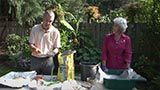
Cold and Smoke Damage
We are a week removed from the big wildfire smoke event for many of our local gardeners, and as people are heading out into the garden they are noticing some changes. A lot of the blooming plants have lost their color, some are dropping leaves, and some of the vegetables are slowing down in their growth. There are a few reasons for this. We’ll start with the ash and smoke. Though there was ash in the air, it didn’t have a huge effect on the plants. Most plants deal with dirt and dust in their normal growth cycle. The particulates in the air may have had a minor effect. Next we had dry winds and that sucked a lot of the moisture out of some of the plants. This can affect the growth of the plants and dry them out. The plants struggle to get that water back into the leaves. When that happens, leaves fall, as Ryan found out on his trees and shrubs in his garden. Finally, we had the darkened skies and cooler temperatures. We went from temps in the 90’s and then down in the 60’s in a matter of hours. Then they stayed that way for nearly a week. This drastic change put a lot of plants into shock. As Judy mentioned, plants are starting to notice the change in sunlight as we enter fall and they start to gear down for the fall and winter. We may have been seeing a little of that kicked up a notch as this smoke event happened.
The key takeaway from all this is that you can relax a little. The plants are very resilient and nearly all of them will bounce back. We recommend that you do a little clean up, let the fall sun do its work and if you lose a plant, take care of replacing it next spring.
Freezing Tomatoes
When we get to late summer and early fall the tomatoes start their sprint before winter and push a lot of fruit on their vines. What can you do when all your fruit is showing up at once? You can freeze them! We stopped at Smith Berry Barn where Joelle and Ryan both shared tips on how they freeze their tomatoes before it gets too late. Ryan started first and talked about how he washes the fruit, makes a tiny cut on the bottom of the tomato and blanches them. This means that he puts them in boiling water for a couple minutes until the skins start to peel off and then they go into an ice bath to cool them down. Once peeled he chops the tomatoes up and puts them, seeds and all, into a freezer bag. His family measures out each bag into cups, so they know what they need for sauces and stews. Those bags go into the freezer for use later.
Joelle has a similar process of blanching and peeling, but then she cuts her tomatoes, this time it was Roma sauce tomatoes, in half and then removes the seeds. This gets rid of a lot of the extra moisture that you have when you are doing sauces. The seeds are also gone which means the sauces are smoother. Then she places them, cut side up, on a cookie sheet and freezes them. When they are frozen they are transferred into a freezer bag and she can pull them out individually for the correct amount for stews and sauces. You can continue to freeze the tomatoes as they become ripe since you don’t need the amount you would normally need for a batch of canned tomatoes.
Right now they are getting close to wrapping up the tomato harvest at Smith Berry Barn. If you would like to get some extra tomatoes frozen or canned, you can schedule an appointment to pick your own or even have them picked for you. Simply check out the Smith Berry Barn website for available picking times and to see what other great fresh fruits and vegetables they have available.
Make Concrete Leaves
Buying garden art can be expensive, but what if you made your own? One of the projects that we’ve had the most fun doing was leaf casting. This is where you use concrete (or a similar substance) to capture the patterns on your biggest and best garden foliage. To get some step by step instructions we met many years ago with our friend Nancy Grossenbacher. and her friend, Carol DuBosch. They gave us the directions that we are using today to show you how to do it. We started with the basics you need to get started. First you need to find a good leaf. You are looking for one that is solid and can handle a little pounding. The pounding occurs when you are applying the cement so make sure it is a thick leaf with good vein structure. Next you want to assemble your tools and materials. The ‘concrete’ that we use is actually a vinyl concrete patch. It is a mixture of different products that actually hold up well during the process and over time, so your leaf will look great for years in the garden. The rest of your kit should include brushes, files and sandpaper to help sand your project when you are finished to smooth it out. A roll of duct tape is also good to repair any little holes in your leaf so you can finish your project if your leaf gets a tear. Now that you have all your materials put together you will need to build a form. We used a mound of compost from the garden to make the form, but you can go with a flat surface if you want a flat casting. Ryan patted it down hard to give himself and Judy a good base on which to build their leaves.
Next we brought in Judy to actually do the applying of the cement. First she made sure that the mound was big enough. You don’t want it too small or the leaf won’t turn out right. Then she started to mix the concrete, adding a little water at a time to make sure you can control it when it is on the leaf. You don’t want it too runny. You then start to apply it in the middle, and patting hard, work your way to the edges. Don’t go over the edge. Make sure you stop before the edge and give yourself a nice thick edge to work with so it doesn’t break when you pull the leaf off. Once you have covered the whole leaf to the right thickness you will want to let it set at least overnight if not longer. 12 hours should be the minimum amount of time to wait. After it sets you can then just peel the leaf off to reveal the leaf pattern. If parts of the leaf get stuck in the cement grooves you can use a dental tool, needle or scissor point to pry it gently out. Some people paint the finished leaf, but you can just leave it alone to age naturally in your garden. If you would like more detailed instructions, check out the link here.
Ryan’s Garden Makeover #2
A couple months ago we visited a home where Ryan had worked his magic and did a home makeover. Today we visited another home where he help transform an area. The reason for these makeovers was as a benefit for the Leukemia and Lymphoma Society. The Seely family had hosted the fundraiser because the society was a key supportive group when his daughter Anna was battling cancer many years ago. She is fine and the auction is a huge thank you for that wonderful support.
Last time Ryan had to deal with a shady garden among some tall fir trees. This time he was out in the blazing sun, and on a slope! We met with homeowner Vicki, who with her husband Steve, asked Ryan to deal with this bare slope. Vicki was tired of looking out from her home at a bare slope of soil. Plus, they wanted something interesting, color wise, to look at as well. Ryan used some of the great plants from Little Prince and other donations to create a nice mixture of color plants, trees and shrubs. Among the favorites, salvias for the hummingbirds, hebes for Vicki and a beautiful dogwood that will look great next year when it is established. There are also some plants that will eventually create a barrier to shield the view from the neighbors. Since a lot of these plants are perennial and some are evergreen, they will perform all year long. We thank Vicki and Steve for their support of the LLS and congratulate them on their new garden!
|