|
Summer here and the livin’ is easy! After the heat of this past spring, it is nice to have the cooler temps here at the tail end of June. It is easier for the plants to recover before the heat returns in July and August. Right now you should be looking at your garden and seeing how your plants are doing. Are they ready for the next two months? Check your irrigation and see if it is up to par. Use some of the watering tips from our friends at the Regional Water Providers Consortium, so you are sure you are getting the most efficient use of your water. You can also think about replacing your plants so they are more adaptive to our climate. In fact we have a story just on that!
Summer also means fresh fruit and veggies. If you are growing your own you know that they are coming on strong right now (we have already harvested tomatoes in our garden), but if you don’t have anything to eat in your garden, make sure that you stop by your local farmer’s market or produce stand. That is where you will find the freshest produce, but you are probably helping out a local family too! Plus, fresh always tastes better!
Most of all, enjoy these early summer days. From here on out, the days will be getting shorter. Enjoy!
This week we featured...
Patio Misters
The heat of summer can be unbearable at times. It can be so bad that it chases everybody indoors which makes it hard to enjoy that garden that you have worked so hard to create. We found a great way to beat the heat, install a misting system in your garden! We stopped by Right Irrigation (360-696-1831) and talked with Cindy again about the Mist and Cool system. This is a simple system that doesn’t need much more than a hose adapter, some tubing and some misters. This system uses the direct pressure from your regular hose outlet to provide the mist. Just get the right amount of tubing, cut and install the misters, and secure it to your roof line or patio umbrella and you are good to go! Cindy recommended that you hang the misters below any surface that might interfere with the flow of water. You don’t want any dripping to occur! Of course, if you have any questions, just contact our friends at Right Irrigation!
Birds, Rats and Squirrels
When you feed your local birds you may be also inviting other, unwanted guests to the dinner table too! Namely we are talking about rats, squirrels, raccoons and possums. We paid a visit to the Backyard Bird Shop (503-620-7454) and talked to Angie about this problem and how you can avoid it. First of all, birds are messy eaters and that is the main problem. They will spill seeds and shells from their feeders all over the ground. Plus, if squirrels get into your feeders they can add to the mess. Once this food is on the ground you will soon have visitors like rats. Rats are not picky eaters. They will even take the left over shells. One way to avoid all these extra visitors is to place trays or devices to catch that extra spilled seed. Some of the feeders now have trays which will catch the seed and keep it off the ground. If you already have a feeder there are lots of different trays you can buy that will fit on any feeder. Another great product was a pecan feast log. This log had ‘shell-less’ seed held together by gelatin that reduces waste since the birds only take what they need. If you have a suet feeder then you should look for suet cakes that don’t have seeds in them. These will keep the food off the ground as well. If you would like to try to reduce the spillage by changing your seed you have 2 choices. The first choice is a shell-less seed. This will reduce the waste on the ground and thus the unwanted visitors. The second option is to buy some ‘Hot Meats’. This is a hot pepper oil treated seed. The birds don’t have taste buds so they can eat the seed, but the mammals end up with a burning tongue and they stop coming to the area around the feeder. If you already have a lot of seed at your house, they also carry a ‘Flaming Squirrel’ liquid of the same type of pepper oil that you can treat your existing food before you put it out. If you are noticing a lot of rats, mice, possums and raccoons in your yard, then try some of these products and help show those guys that the kitchen is closed!
RWPC - Greg’s Low Water Garden
A few weeks ago we met with Greg from Xera Plants to talk about climate adaptive plants. These are plants that can handle our intense rain in the winter and the long periods of drought in the summer and still thrive. This week we met up with him at his garden in northeast Portland to see how he has used these plant in his own garden. With the front yard as the backdrop, he told William how he started 4 years ago with smaller plants. Now it is a jungle! There is so much different foliage color and texture! He started with a very traditional landscape. He had hedges, rhodies and lot of grass. He also had a large maple in the parking strip out front that put everything in the shade. The tree turned out to be diseased and so when it was removed it turned a shade garden into a full sun garden. That made a blank palate to work with. First Greg sheet mulched the yard. That was just cardboard covered with mulch to kill all the grass and then he started planting. Of course the first year there was some watering just to get the plants established, but now there is little to no water being used to maintain the garden. Greg does use a little water to make sure that newer plants get a drink every once in a while, but the amount of water has dropped significantly. The key in the front yard is that he pays attention to the plants and they tell him if they get too dry or are stressed from the drying east winds that come though his yard.
We then moved to the backyard and talked about issues he had there. The backyard has more shade and is a little cooler, but here too, he has replaced the lawn with dozens of plants. Part of the planting includes a vegetable garden, which gets most of the water in this area. William also noticed that Greg has a lot of pea gravel as a top dressing. Greg told us that the gravel helps to break the surface tension of the soil and so the small amount of water that is used in the garden is actually taken up by the plants better.
Greg mentioned that a lot of what he has learned and shared with other gardeners has come from the Regional Water Providers Consortium. He hands out the Water-efficient Plants for the Willamette Valley booklet at his nursery. You can download a copy here. If you have questions about your water usage, feel free to check out their website for more helpful tips.
Backyard Patio Makeover – The Wall
What happens when you move to a new area and you buy a home that needs help, both inside and out? You call an expert! Anne Porfirio moved to our area and bought a 1925 era home that needed lots of work, so she had everything brought up to code and even added 4 feet to the back of the house. That changed the whole backyard quite a bit. That is when she called The Wall (503-735-9255). She was looking to make an area as safe and welcoming as her grandparents’ home when she was growing up and David from The Wall helped her achieve that. He started first in the front where they built a retaining wall with stone and dealt with a huge slope. Then he and the crew moved to the backyard. They removed a lot of soil and, working with landscaper Larry Borland, built a wonderful patio and garden. David even took a collection of doorknobs and other items and worked them into the hardscaping. Now you can see mail slots, doorknobs, gargoyle faces and cabinet handles in the wall. Larry’s design also includes flagstone paths through a low-maintenance landscape, with plenty of places to play for Anne’s grandkids. They even have a Fairy Garden!
If you were thinking of redoing your backyard or needed a little help with fixing a steep slope, give The Wall a call!
Heirloom Summer Rose Tips
Roses love summer! Still there are a few things you can do for your roses to help them shine in the warm months ahead. Ben from Heirloom Roses (503-538-1576) met us in the display garden to talk about tips you can do in your rose garden. He showed us the variety ‘Amazing Grace’ and it had some blooms that were already done. He showed us how to go back down the stem to the first ‘5 leaf’ node on the plant and prune it off. This 5 leaf area is where new growth will come from, and in 60 days you would have new blooms showing up. If you ‘deadhead’ these old bloom a few at a time you will have new flower to enjoy in August. You should also watch your watering. Roses need 3 to 4 inches of water a week in the heat of summer. Apply a couple of inches of water a couple times a week and your rose will thrive! Also, make sure that you water in the morning and allow the heat of the sun to dry the foliage and you will avoid some disease problems down the road. Fertilizing is also important. Those blooms need a lot of energy to keep coming, so use a granular fertilizer about every 6 weeks to give the plant the energy to keep blooming. A 16-16-16 fertilizer mixture should do the trick. The other thing that Ben told us about was diseases. If you do notice a problem like Blackspot, he recommends a spray with an organic or in-organic product to combat that problem.
If you want more tips on growing your roses, or you want to add a rose to your garden, you can always contact Heirloom Roses.
Hypertufa Pots
Hypertufa is the art of making lightweight cement pots. Donna Wright from Black Gold/Sungro gave us the step by step instructions for making these wonderful pots. Hypertufa means ‘light weight cement pots’ and she walked William through the process of making them. The 3 ingredients to remember are ‘Peat, Perlite, and Portland Cement’. You can customize them by adding moss, creating patterns and changing the color when you make them. It is a great project for families and will last for years! Check out the recipe if you missed it on the air.
Being Friendly to Bees
Bringing bees to your garden is always a welcome thing, but what can you do to be a good neighbor to our pollinator friends? We met with OSU professor and extension agent, Gail Langellotto to talk about what gardeners can do to welcome bees to our gardens. The most important thing she mentioned was flowering plants. The research that they have performed shows that a wide selection of flowering plants is at the top of the list for ‘bee friendly’ gardens. Gail also said that it is even better if you adopt a no pesticide policy in your garden. By reducing your use of insecticides in the garden you will give those bees a boost! This brought up the topic of ‘colony collapse’. Colony Collapse was in the news quite a bit a few years ago. The problem was pegged to a lot of issues, including pesticide use, mites and even climate change. There are a lot of factors involved and studies continue, but the important thing is that we are now paying more attention to bees and trying to make a healthier environment for them.
Other ways to help bees is to create habitats for them. For some that includes adding bee blocks to their garden. These blocks are great for cavity nesting bees, but it is just a start. 70 percent of bees nest in the ground. Gail recommends that you leave clear spaces in the garden. Areas with little or no mulch are welcome territory for these types of bees. Of course we are dealing with live animals and so she also recommends that you have a water source nearby. This will help them stay healthy, which makes for a healthier garden for you! For more information on helping bees you can check out the OSU Extension website at http://extension.oregonstate.edu/gardening, or the OSU Master Beekeeper website at http://extension.oregonstate.edu/mb.
4 Simple Trellises
If you are looking to add height to your garden you can buy something, or you can build a simple trellis yourself! William and Judy walked us through the steps of building a couple of different ones. The first one was easy. William used a tomato cage to help his climbing peas. Judy then showed us the second trellis, which was a simple teepee of bamboo sticks. She tied them at the top and they made a quick and simple structure. The third structure was a folding trellis made from PVC pipe. We cut the pipe into various lengths to fit our garden size. This one had 3, ¾ inch pipes that were 3 feet long. These are for the two base pieces and the top. Then we cut 4 longer pieces (6 foot) these are for the sides. 6 elbows create the square and then we also had 2 tees. The top of the tee was a bigger size than the rest of the pipe. This will allow the folding of the trellis when the season is done. The finishing touch was the string. Last year we used a hemp string for the plants to climb on. This quickly broke down and that meant it didn’t work as well as we had hoped. This year we are using a cotton fiber string, which will give our trellis the strength to give our beans and other climbing plants a good strong base to grow on. The final one was a simple set-up of eyehooks that were screwed into the post on an arbor that we built a couple of weeks ago. Then we ran fishing wire through the hooks to make a structure for the plants to climb on. The fishing wire was invisible to the naked eye and if you are looking for more support you could use a wire, or if you wanted something more ‘earth-friendly’ a hemp string would be good. Give one (or all of them) a try and see if you can get your gardening ‘off the ground’.
Chains, Chimes and Benches
Your garden can be so much more if you consider adding a few little structures to it. We all love our plants, but garden art and functional pieces can make your garden really stand out. To learn how to add pieces to our garden we stopped by French Prairie Perennials and talked to Kerry. French Prairie Perennials is usually where we go to chat with her husband, Rick, about cool plants, but they also carry other thing for the garden as well. She brought us inside to look at rain chains, wind chimes and garden benches. We started with wind chimes. Chimes can bring sound and motion to the garden. A little breeze can bring attention to different parts of your garden. If you don’t like the tinkling of the metal chimes, there are lots of other materials that make different sounds. We then moved over to the rain chains. This too will add a new element to your garden especially if there is a little rain. One of the most popular chains was one that had twirling discs along the chain. Plus they are easy to install! Finally, we saw a few of the benches they had on display. You work hard in your garden to get it just right, why not place a new bench there so you can sit and enjoy all that hard work. They come in lots of styles and colors so you can find one that will fit right into your garden’s current décor.
These are just of a few of the non-plant treats you will find at their store. They are also loaded full of great gifts. Stop by their new location in Aurora and check out the inside and the outside!
Beyond the Bloom Trees
Trees are great in the garden, but sometimes you want something that brings interest to your garden even after its done blooming. There are lots of trees that fit that description! To some of these multi-interest trees we met with Nancy Buley at the J. Frank Schmidt and Son Arboretum to check out a few. The Arboretum is 10 acres full of 500 plants that are actually an outdoor showroom of their product line. We started at a Japanese Snowbell. These are known for their incredible blooms in late spring, but they also have wonderful foliage that starts out green and darkens over time. Then in the winter it has a cool branching structure too. Next we moved to an area of parrotia trees. The common name for these are Persian Ironwood. These trees bloom in early spring, but they have great foliage color featuring red and burgundy highlights. They are also nice and upright, so they can fit into any garden. Finally we went to an area with dogwoods. These were all variegated and so not only did they have great late spring blooms, they also had incredible 2-tone leaves that really shine in the garden.
These are just few of the great trees they grow. They are a wholesaler so you can’t buy from them but check out their website and then go to your local independent garden center and ask for your favorite tree, and they will get one for you!
Leaf Casting
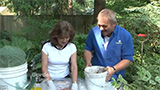
Buying garden art can be expensive, but what if you made your own? One of the projects that we’ve had the most fun doing was leaf casting. This is where you use concrete (or a similar substance) to capture the patterns on your biggest and best garden foliage. To get some step by step instructions we stopped by the home of our friend Nancy Grossenbacher. She and her friend, Carol DuBosch, saw a leaf casting demonstration years ago and decided that they could do it too. Now they have taken all that they learned and they are sharing that knowledge with everyone, including our viewers. Nancy started by tell us the basics you need to get started. First you need to find a good leaf. You are looking for one that is solid and can handle a little pounding. The pounding occurs when you are applying the cement so make sure it is a thick leaf with good vein structure. Next you want to assemble your tools and materials. The ‘concrete’ that they use is actually a vinyl concrete patch. It is a mixture of different products that actually hold up well during the process and over time, so your leaf will look great for years in the garden. The rest of your kit should include brushes, files and sandpaper to help sand your project when you are finished to smooth it out. A roll of duct tape is also good to repair any little holes in your leaf so you can finish your project if your leaf gets a tear. Now that you have all your materials put together you will need to build a form. Nancy used a mound of compost from her garden. It was patted down hard to give her and Carol a good base on which to build their leaf.
Next we brought in Carol to actually do the applying of the cement. First she made sure that the mound was big enough. You don’t want it too small or the leaf won’t turn out right. Then she started to mix the concrete, adding a little water at a time to make sure you can control it when it is on the leaf. You don’t want it too runny. You then start to apply it in the middle, and patting hard, work your way to the edges. Don’t go over the edge. Make sure you stop before the edge and give yourself a nice thick edge to work with so it doesn’t break when you pull the leaf off. Once you have covered the whole leaf to the right thickness you will want to let it set at least overnight if not longer. 12 hours should be the minimum amount of time to wait. After it sets you can then just peal the leaf off to reveal the leaf pattern. If parts of the leaf get stuck in the cement grooves you can use a dental tool, needle or scissor point to pry it gently out. Some people paint the finished leaf, but you can just leave it alone to age naturally in your garden. If you would like more detailed instructions, check out the link here.
|