The harvest is nearing the end. This week we got out between showers and picked some of the last of our crops from the garden. The grapes are now gone. The last of the pears and apples are in the fruit bowl on the table. We are just finishing up the zucchini, peppers and cucumbers too. The only things that will keep going until frost are the tomatoes, but we can see that they are slowing down too. That doesn’t mean that we are feeling down about the season. We have already talked about next year’s garden. It is never too early to plan! We also tell people that fall is a great time to plant new plants in your garden. The soil is warmer than it would be in the spring and that means your plants get a better start! In fact, we have some great fall projects for you in this week’s show.
This week we featured...
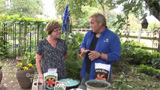
Forcing Bulbs
Looking to add some color to the upcoming holidays. Donna Wright from Black Gold showed us how to force your favorite bulbs into spectacular beauty for the winter months ahead! She demonstrated how easy it is to force Paper Whites. You can use any pot or decorative container and you can use a variety of different soils and stones to do it. Now is the time to do this as the selection of bulbs in the garden centers is at its best right now.
Preserving Hydrangea Blooms
Saving the color of summer is easy if you are growing hydrangeas. Kristin from Hydrangeas Plus (866-433-7896) told us how easy it can be to preserve your blooms by following a few simple steps. First, don’t do it too early, unless you have a preservative handy. She recommends that you use a preservative in some water if you want to extend their lives as a cut flower. But for the long term you will want to let them age a little on the plant until they feel a little like paper. The early blooms have more color, but they are also touchy and need TLC and a professional preservative to keep that fresh color. Most varieties will dry on the vine to a nice chartreuse color that can last all winter long. Check the Hydrangeas Plus website for more tips.
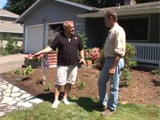
Dinsdale Garden Path
We are always looking for ‘structure’ in the garden. Hardscapes like paths and trellises are beautiful and functional at the same time. This week we met up with Alfred Dinsdale from Dinsdale Landscape Contractors (503-925-9292) to learn how to install a garden path. A lawn area was being replaced with more planting beds and the path was just one of the things that were being worked on. To get started, we first sprayed the lawn with Round-up to kill the grass. Then we roto-tilled the dead grass into the beds to add organic matter to the soil. This grass will break down over time and add nutrients that the new plants will need. Once that was done the path was marked out with stones to get a feel for the width and that is when Alfred and his crew came by to install the path. They first removed the stones and set up string and some metal railings to mark where they were going to install the path. Next they removed the loose soil down to the hard compacted soil. This soil was very compacted and that is what we needed to make sure that there was no settling of the soil (which would make an uneven path). Next, crushed gravel was brought in and spread out over the base of the path. This will allow for good drainage and provides a good solid base for the next layer of sand. The sand is leveled, using the railings as a guide and now we move to the artistic part of the project, the laying of the stones. We selected a Pennsylvania Blue Stone, which had been tumbled to soften the edges. These pieces were twisted and turned until they fit into place. It takes quite awhile to get them to fit into the nice tight pattern. Once they were in position metal strips were placed along the edges and staked into place with rebar. The Rebar was welded to the strip and it created a strong ‘box-like’ structure to hold the stones in place. The cracks were filled with sand and the project was done. This path looks great and because of the expertise of the Dinsdale crew it will last a long time! If you want to build your own path simply watch the video or you can do what we did and call Dinsdale Landscape Contractors!
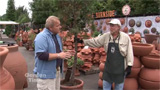
Baja Tree Pot
We had quite a project this week when we stopped by Little Baja (503-236-8834). Wayne called us to get a little help in transplanting a tree in a container. The tree had been in the pot for over 10 years and had become root bound. It had also grown so much that it had plugged the drain hole at the bottom of the pot. It was very important that we repot it so it could have good drainage again. It was a good lesson in how to transplant a tree and the steps you need to follow. For years we have told you about the benefits of planting in a clay pot. The clay is a natural product and it breathes which allows the roots to get more oxygen. That lets the plant thrive; well this one had thrived too much. We had to use a saw around the edges of the pot to loosen it. But, it was too tight in the container and we broke a wonderful old pot while trying to remove the tree. Once the tree was out Wayne was going to cut up the root ball a little and prune off the larger of the roots. This will allow the tree to be repotted in a new home with great drainage. Wayne will help that drainage with a pot stand or feet under the container. If you would like some tips on repotting your plants or you need an excellent container to put them in, you can stop by either of the 2 Little Baja locations.