|
COVID-19 AWARENESS: Please note that we are taking all necessary precautions to keep our on-air personalities, interviewees and crew safe during this challenging time. However, we do run repeat stories and segments that were shot last year, before social distancing practices were recommended by health officials. If you see our hosts standing close to someone, please be assured that the segment was shot before March of 2020. We thank you for your concern and your interest in Garden Time.
The hot and cold of fall is here. I say that because this past week we felt the heat of starting up our furnace and our woodstove, followed by the freezing temperatures of fall. Yes, the change of seasons is here and the rush is now to get all those fall garden chores done. Even though the cold overnight temps were just here temporarily and we have moved back up into more normal temps, tender plants, outdoor furnishings and fall veggies have to be taken in or protected.
This week we tackle a few stories to help you prepare for fall. Of course, OSU Extension has plenty of other ideas to help you get started. Check out Jan’s story this week to learn more.
This week we featured...
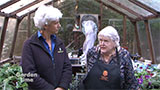
Jan’s October Tips
The fall is the time to start your annual garden clean up and getting everything ready for the upcoming cold. It is also a time to get ready for the upcoming spring. We always get some great tips from Jan McNeilan and this month is no different. Some garden chores include prepping your plants for the winter outside and some chores deal with getting stuff ready for inside your home. If you had your Christmas (or Thanksgiving) cactus outside over the summer you may notice that they are now loaded with buds of future blooms. The longer you keep them in the cooler temps outside, the long before they bloom. Jan is going to leave hers in the cold another week or so before bringing them inside. Once they hit the warmer air those blooms will pop. If there is a hard frost coming, you may want to protect them or bring them inside to prevent any damage. Another way to protect plants is by using a leaf mulch on them. If you have watched the show over the years you have seen Jan pile her falling leaves over her beds and her potted container plants. This will give them an extra layer of protection from those cold frosty winter days. In the spring you can remove the leaves and add them to your compost pile. While you are covering those beds with leaves you may see some spring bulbs starting to pop out of the ground. Don’t worry about them getting damaged by frost or colder temps. This is normal and these are very thick primary leaves that are emerging. The actual blooms are still way down in the bulb and are protected. The plants know when to pop up and it will be awhile before they do, so you can just leave them alone. Speaking of bulbs, if you still have spring bulbs that need to be planted now is the time to do that.
All this garden information can be learned and signing up for Master Gardener classes is a great way to learn more about gardening and maybe even help others who garden. Classes usually happen during the winter, but you can show your interest by signing up at the OSU Extension Master Gardener website.
Jan then talked about cleaning up your act! Actually, cleaning up your garden. If you have dead or diseased plants or foliage, now is the time to cut those plants back and to dump your cuttings in the trash. If you add this to your compost you could be saving those diseases and spores in that compost pile. Then next season you would be spreading those same diseases back to your garden. Best to get rid of them now! Jan also mentioned that you should store your granular fertilizers and other garden products in a protected, dry place over the rainy winter to keep it from clumping. As you can see there are a lot of things to do in the garden as we get ready for the winter. For more garden tips and research based information you can follow Jan on Facebook or check out the OSU Extension website (https://extension.oregonstate.edu/gardening).
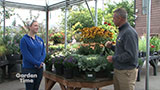
Portland Nursery Garden Design
If you are looking to re-landscape your yard or garden, it can be a bit intimidating, but it doesn’t have to be! Fall is a great time to consider making over your garden. Plants get off the ground faster in the spring if you get them in the ground now while the soil is still warm. Getting started now will give you more time to enjoy that new landscape next spring. If you are a little intimidated with getting started or not knowing where to start may we recommend Portland Nursery on Division (503-788-9000) to help you with the design. Sara told us that the Division Street location has an on-staff designer to help you and share tips on what to consider about landscape design. First of all people should not get nervous about asking questions. According to Sara some of the first questions are easy to answer. Budget is on the front of everyone’s mind. You can control the budget by talking to their designer and doing a lot of the work yourself. If you bring in your ideas and pictures of what you would like to see, either from magazines or from gardens you like, they can help steer you into the right plants and the easiest and cheapest solutions. Sara also talked about how coming to Portland Nursery is going to benefit you in your plant selection and planning. Portland Nursery professionals will help you pick the right plants for the right place and those plants are guaranteed. This is not like hiring someone with a magnetic sign on the side of their pickup! If you are looking for some help in taking those first steps in your garden re-design, stop by Portland Nursery on Division!
Casting Concrete Leaves
Buying garden art can be expensive, but what if you made your own? One of the projects that we’ve had the most fun doing was leaf casting. This is where you use concrete (or a similar substance) to capture the patterns on your biggest and best garden foliage. To get some step by step instructions we met many years ago with our friend Nancy Grossenbacher. and her friend, Carol DuBosch. They gave us the directions that we are using today to show you how to do it. We started with the basics you need to get started. First you need to find a good leaf. You are looking for one that is solid and can handle a little pounding. The pounding occurs when you are applying the cement so make sure it is a thick leaf with good vein structure. Next you want to assemble your tools and materials. The ‘concrete’ that we use is actually a vinyl concrete patch. It is a mixture of different products that actually hold up well during the process and over time, so your leaf will look great for years in the garden. The rest of your kit should include brushes, files and sandpaper to help sand your project when you are finished to smooth it out. A roll of duct tape is also good to repair any little holes in your leaf so you can finish your project if your leaf gets a tear. Now that you have all your materials put together you will need to build a form. We used a mound of compost from the garden to make the form, but you can go with a flat surface if you want a flat casting. Ryan patted it down hard to give himself and Judy a good base on which to build their leaves.
Next we brought in Judy to actually do the applying of the cement. First she made sure that the mound was big enough. You don’t want it too small or the leaf won’t turn out right. Then she started to mix the concrete, adding a little water at a time to make sure you can control it when it is on the leaf. You don’t want it too runny. You then start to apply it in the middle, and patting hard, work your way to the edges. Don’t go over the edge. Make sure you stop before the edge and give yourself a nice thick edge to work with so it doesn’t break when you pull the leaf off. Once you have covered the whole leaf to the right thickness you will want to let it set at least overnight if not longer. 12 hours should be the minimum amount of time to wait. After it sets you can then just peel the leaf off to reveal the leaf pattern. If parts of the leaf get stuck in the cement grooves you can use a dental tool, needle or scissor point to pry it gently out. Some people paint the finished leaf, but you can just leave it alone to age naturally in your garden. If you would like more detailed instructions, check out the link here.
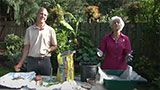
Dividing Fall Perennials
Dividing your perennials in your garden is not hard. In fact you can do it with just a shovel or trowel. Judy and Ryan found a couple of plants that have just gotten too big in the garden. The reason for dividing them may be that they are too big for the area, have gotten too leggy (long flower stalks that flop) or they are dying in the center where all the new growth is around the outside. Judy started with a heuchera. This is a plant that had just gotten too big for the area it is in. She first found the irrigation line, so we didn’t cut it when digging. Then she gently dug around the piece that we were removing. With a garden knife she cut off a large chunk of the plant with a nice root ball to move to another part of the garden. You want a nice large chunk if you can get one, since it will have a nice root system to start growing again.
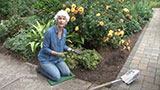
We then moved over to Ryan where he was tackling a helenium. This is a plant that has gotten too leggy. The flower stalks had bloomed and fallen over and the center of the plant was looking weak. So he did the same. He cut around the outside of the part he wanted to transplant and took a nice big chunk with a good root ball. It was ready to go into another part of the garden.
A couple years ago we divided a lobelia that had just spread too far in the yard. It was covering part of the lawn and was hanging out into the street. The first thing we did was to cut back the plant. The early spring or late fall is the perfect time for dividing your plants. The foliage is dead or dying, and by cutting it back you can see the entire crown of the plant. Then we took a shovel and just drove it down into the middle of the plant. By cutting a line across the middle of the plant we were able to cut out that part of the plant and keep it from spreading into the yard again this year. The best part? We now have parts of our favorite plant that we can share with our friends and family.
If you want to get more precise in your dividing, you can dig the entire plant up, cut it apart and then replant a smaller portion. Either way, it is easy to divide most of your garden perennials like this! Also, by digging and transplanting in the fall you can take advantage of warmer soils and fall rains to help the plant acclimate to its new surroundings. For more tips on dividing perennials check with your local independent garden center, or check out this webpage and chart from the University of Minnesota Extension Service for lots of great information!
Late Season Sprinkler Maintenance
The arrival of fall means that our days of watering our outdoor plants and gardens are coming to a close. We met with Kevin from Lake Oswego and the Regional Water Providers Consortium to talk about how to put your sprinklers to bed for the season and other watering tips. We met with him down by the street near a covered backflow device. This device protects against the community water being tainted by water flowing backward from your home system. Some homeowners use fertilizers and other products in their home systems and this helps to keep all our water clean. Kevin showed us how to turn off the valve and insulate the backflow device to prevent frost damage. He also recommended that you turn off your system control panel for the season at this time as well.
We then moved up to the house and talked about hoses. You can now give your plants, protected under the eaves of your house, one last drink from the hose. Then unscrew the hose and drain it! Coil it up and put it away. This will help your hose last longer and it will also drain all the water from your hose bib (the faucet on your house) to prevent damage to that valve as well. While you are outside make sure that your downspouts and storm drains are free and clear of leaves and debris. Any buildup of water here can damage your home and siding.
Finally, if you think you might have a leak between your water meter and your home, there is an easy way to check that. Simply find your water meter and take a look at the gauge. Then shut off all the water in your home. Go out after an hour or two and see if the meter needle has moved. If it has, you might have a leak and you should contact a professional. For more great water saving tips for inside and outside your home, check out the Regional Water Providers Consortium at https://www.regionalh2o.org.
|