|
Dog days of summer are here. Keep drinking that water and enjoying the garden. Plus don’t forget to shop those local farmers markets to get the freshest produce of the season.
This week we featured...
Blooming Junction Veggies Chips
Everyone is looking for a healthy snack, but if you find them in the store, they are very expensive. What if you could make your own natural chips right in your own kitchen? You can! We dropped by Blooming Junction in Cornelius to talk to Justin about how to make chips from some very common veggies. He started with Sweet Potatoes. The key to making a quality chip is to have your slices all about the same thickness. He told us that 1/16th of an inch is a good thickness to aim for. To make this easy you can use a mandoline which will allow for uniform cutting. Then you will coat the chips with a tablespoon of coconut oil or olive oil (per cup of slices) and a ¼ teaspoon of salt. Then you mix everything up making sure that all the slices are separated and coated with oil and salt. At this point you can add any other flavorings as well. Maybe a little cayenne or some cumin, maybe even some powdered lavender. Justin then placed the individual slices on a foil covered cookie sheet and placed them in a pre-heated 300 degree oven. After 15 minutes we pulled out the sheet and rotated it in the oven. After about 10-15 minutes you should be done. Of course, this timing will depend on the thickness of your slices. Thicker slices may require a longer time.
Now you may want to try this with a vegetable with a higher water content, like beets or zucchini. For those you will slice them the same as before, but then you will coat them with salt to sweat out the excess moisture. You will dab that moisture off the slices and place them in the oven as before. These vegetables may also need more time in the oven, up to 45 minutes.
If you love kale chips those are even simpler. Just wash the leaves and tear them off of the center stem (and compost that). Coat them with oil and salt making sure that the leaf pieces are entirely coated. These go into the oven at a much shorter time, maybe 15 minutes at 225 degrees.
You can learn to make wonderful snacks and meals just like these chips at Blooming Junction. They have classes all the time, just check their website. Also, they grow a lot of the vegetables that you love right there on the farm. Stop by for tasty vegetables, and wonderful plants!
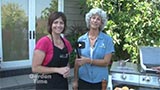
Taking Garden Pictures
Capturing the beauty of your garden guarantees that you can keep those colors all year long! To get some tips on getting the best pictures, Judy met up with Hannah Gustin who is a professional photographer. She has taken some award-winning photos and told Judy that everyone can take great garden pictures, if they follow some simple rules. The basics… know your camera! Even if you just take pictures on your phone, most of those have specialized settings that will help you take better pictures. A SLR/DSLR camera is the choice for most professional photographers, but as long as you have something that you feel comfortable using, that makes all the difference. Hannah uses a Nikon and has everything she needs before she heads out the door. Having all your gear with you is a must. If you are organized then waiting for the right shot becomes easier. Next, watch the lighting; don’t look for a bright sunny day, overcast days will eliminate the hard shadows and provide a more even light. Early morning and late afternoon also creates an interesting lighting situation. If you do have bright sun, look for dramatic sunny or backlit shots. It also helps to wait for a calm wind; this will give you a crisp, clear picture and not a blurry one. Use a tripod and take your time; stability and patience are the most important items for the garden photographer. Finally, take lots of shots! Digital cameras are great, you are only limited by the size of your memory card. Delete the bad and keep the good. You will be rewarded with some great shots if you follow these simple tips. Now get out there and take some great pictures!
Drought Stress Trees
This summer has been long, hot and dry. That has created some problems for the trees in our area. To see some of the damage and get some tips on tree care we met with Lyle from Bartlett Tree Experts (503-722-7267) at his home near Damascus. He said that you should look for the signs of drought stress on your trees. Those include curled leaves, scorched leaves and even burned and pealing bark on some trees. Some will even lose leaves if they are very stressed. For some trees, like maples, that could also mean the beginning of changing to its fall color. This too was a sign of drought stress. You may even see drought symptoms on your conifers. All these symptoms can open up your tree to other problems too. The tree is a pressurized system and if there is not enough fluid in the system it opens up the tree to attacks from pests. At Bartlett they are seeing more borer attacks, aphids, and foliar diseases.
What can you do to help your trees survive? Even if we have had a couple of showers in the area or you do some watering already, Lyle recommends that you give your trees a deep watering. Adding mulch and fertilizing will help as well. Bartlett has a couple of great handouts to help you with your stressed tree. One gives you 5 steps to drought recovery, while the other walks you through the signs of drought and long term problems for your trees without proper help. If you think your trees are in trouble you can always give Bartlett a call and have them come out for a free consultation.
Greenstalk Vertical Planter Update
A few weeks ago we received a new type of vertical planter from GreenStalk Garden. This planter had 4 levels and very easy instructions for assembly. We planted it up with 24 basil plants and hoped for the best! We are happy to report that we have harvested our basil once already and made some incredible pesto. The Greenstalk has been working great. Two things we have noticed. First, the system for the planter itself is great. There is an even distribution of water throughout the planter. Second, the wheels are a welcome addition! These are an extra with the kit, but they make the rotation of the planter easy and so we can rotate it each day so all sides grow evenly!
If you are looking for a system to grow more plants in a small space, consider getting the GreenStalk Vertical Planter!
Grilled Peaches
Along with all the other ripe fruits and vegetables right now are peaches. And one of the latest and tastiest ways to prepare them is on the grill. One of the places you’ll find the best peaches is at Smith Berry Barn (503-628-2172). Before we got to the recipe we learned how to choose the best peaches at the store. Joelle said you should NEVER squeeze them. This is not a reliable way to test them and it will just bruise them in the process. You should just look at the top of the peach at the stem. If the area around the stem is green, or slightly green, then the peach is not ready. It should have the ‘ripe’ color all the way around the stem.
Then we started on the recipe. Take a ripe peach and cut it in half and remove the pit. Brush olive oil on the outside skin and the cut side of the peach. This is to keep it from sticking to the grill. She then sprinkled on some pepper and some Himalayan sea salt and they we ready for the grill. Rich was manning the grill and had it set for medium high. He also brushed on some olive oil to help prevent the sticking. He ended up grilling the peaches for 12 minutes on the cut faced side (to soften them and give them some grill marks) and about 5 minutes on the skin side. Once removed from the grill Joelle scooped some mascarpone cheese into the center of the peach, drizzled on some honey and topped it off with fresh basil cut with her special chiffonade scissors. It was divine!!!
If you would like to try this recipe on your own you can find everything you need at Smith Berry Barn. Stop by, pick up everything and then prepare to wow the family tonight at dinner!
|