I have to say this has been the perfect summer! We have been experiencing pretty normal temperatures with only a few days of extreme heat. In fact, the last week or so it has been splendid. We have had cool mornings and a few clouds burning off to wonderful sunny afternoons. The fruit and vegetable production has been pretty good too. We still seem to be a week or so ahead of schedule for most of the produce in our gardens. If you are having a good year in your garden and you want to save some of that bounty, check out our story from Smith Berry Barn. The heat also may have some of your vegetables needing a little extra water. We can take care of that for you! This week we also visited with our friends at the Regional Water Providers Consortium to get some tips on drip systems for your veggies!
This week we featured...
Fry Road Summer Plants
We recently paid a visit to one of our favorite nurseries in the valley to see what they had been growing for the summer. Fry Road Nursery (541-928-7038) is a great little grower/wholesaler/retailer between Albany and Corvallis that always has some great plants (and deals). Judy met up with Mark in the front parking lot to look at one of their cooler plants! Gunnera is a very old species of plant. One of the common names is ‘dinosaur food’ because of its long history and also because it looks like a plant from prehistoric times. The Gunnera has very large leaves and wonderful seed spikes in the center of the plant. Mark said they harvest the seeds to plant for next year’s plant. You need to give this one some room to grow, it gets really big! Then we moved back into the middle of the nursery to see a bunch of other summer plants they have to offer. The first ones we looked at were a couple of primroses. The Orchid Primrose (Primula vialii) doesn’t even look like a primrose. This one has a large flower spike in the center and likes boggy conditions in full to part sun. The Tibetan cowslip (Primula florinae) has larger flowers and comes in different color variations! The next one was a brand new plant that was discovered at Fry Road. This introduction was a phygelius called ‘Lemon Spritzer’. It has a variegated leaf and comes out with orangey-peachy flowers. Mark really loves variegation in his plants and that led us to his next plant the Euphorbia ‘Tasmanian Tiger’ which has some really cool leaf patterns of light green and cream. A smaller euphorbia (spurge) with variegation was ‘First Blush’ that had touches of red and pink in the leaves.
The next plant may make some people cringe! It was an oxalis, or clover. This one is not one that will take over your lawn though. This one was called ‘Plum Crazy’ and it was an annual, which means it will die during our cold winters. Still with the bright red foliage and the yellow flowers you will want this ‘clover’ in your yard! Another stunning plant that Mark brought out was a Hebe. A few years ago the Hebe got a bad name when we lost a lot of them due to the cold winter we had. This is one that survived and performed well in the garden. ‘Sussex Carpet’ has a low growing habit and gets covered in flowers! It was stunning! Another stunning plant was the Astilbe ‘pumila’. This one has a great fragrance like Kool-Aid or sweet candy. It has tall pink flowers that were outstanding. They do need a lot of water so make sure they are in a well irrigated area in your garden.
You can find these plants and a whole lot more at the nursery. Stop by and pick up a new favorite plant!
Preserving B erries
This time of year there seems to be a fresh new berry getting ripe every day. While there is nothing like the taste of a fresh berry, sometimes we would like to preserve our favorites for later in the season. The best way to do that is by freezing them. To get some tips on freezing your berries we stopped by Smith Berry Barn (503-628-2172) in Scholls. Joelle and Rich grow dozens of different varieties of berries and they have become experts in preserving them. They have to; they use these fresh frozen berries in their delicious shakes and jams all year long! Joelle brought in some fresh raspberries to show us what to do. The first thing you do, no matter which berry you have is to refrigerate them. The berries continue to ripen even after you pick them, so the refrigeration helps slow down that process. If you are getting ready to eat them or can them you wait until you are ready to use them before you wash them. This helps the berry stay firm. To wash them just float them in a bowl of clean water. This will remove any dust or sprays on them. Smith Berry Barn doesn’t use any sprays so it is just a tiny bit of dust that you will be removing. Once they are clean remove them from the water and pat them dry with a cloth or paper towel. If you are washing strawberries make sure you leave the stem on until you are done so the berry doesn’t get any water inside the fruit. Take the stem off right before you eat them or freeze them.
You can now eat them fresh or get them ready for freezing. To freeze them, spread them out on a cookie sheet or other tray in a single layer and place them in the freezer for about 4-6 hours depending on your freezer and the type of berry you are freezing. Take a bite of one to make sure they are frozen completely. You can then pour them into a sealed or zip-lock freezer bag for storage. Make sure you label the bag with the date to keep track of freshness. You can now pull the berries out and use them for any late season recipe that you have. Make sure they defrost before you add them to your recipe. To get some of the freshest berries check out the Smith Berry Barn website. They have a daily updated list of what is fresh in the fields!
Drip Veggies
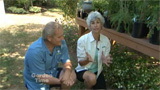
The heat is on and your vegetable garden may be looking a little beaten up with all this good weather. What it might need is just a little drink! We stopped by the home of Bonnie Cushman with the Regional Water Providers Consortium to see her incredible vegetable garden. First, though we started in her backyard to learn how she converted it from a bamboo forest to a wonderful perennial garden. She told William that she started by ripping everything out and then, for the first year, just planting annuals so she could get a feel for water needs and light conditions. This first year let her have a bunch of color and she soon found out where the hottest and sunniest areas were in her garden, then in year 2 she planted her perennials and they have responded really well. In fact, they have done so well that she has only had to water once this season, and that was just a week or so ago. She also had a few pepper plants in containers that she preferred to water by hand. This led us around the corner to another area where she had her raised bed veggie gardens.
Her raised beds were not your normal raised beds. Bonnie and her husband had bought large cattle watering troughs. This was a compromise between Bonnie and her husband. She wanted raised beds and he still wanted a driveway, this worked out well for both. She showed us how she used a system of planting base on ‘square foot’ gardening. Each square foot of garden contains plants with the same water needs and the drip system she uses waters each square foot evenly. The emitters give out about a ½ gallon an hour, not a lot of water but the right amount concentrated at the root zone. You can tell if the plants are getting the right amount by watching your plants to see if they thrive or if they wilt. You can also check by simply sticking your finger in the soil to check the depth of the moisture. Bonnie’s system was just a splitter off of a regular garden hose. Each spigot had an on/off valve for 4 different drip lines. The most important part of this system was the ‘regulators’. These are pressure control valves that lower the pressure of the hose so the drip emitters are not blown off. Once these were in place Bonnie was able to build her system with confidence. If you are looking for tips on building your own system you can check with your local garden center. If you are looking for tips o saving water in your garden or around your home you can check out the Regional Water Providers Consortium website at www.Conserveh2o.org.
Worm Bins
We are talking about healthy gardens and with this story it all begins with poop. Worm Poop (or castings) to be exact. Compost bins and worm bins are one of the best ways to help the environment and your garden at the same time. We stopped by Portland Nursery (503-231-5050) on Stark to see some of the different ways you can recycle your yard and kitchen debris to create an all natural fertilizer. Sara started by showing us a homemade worm bin. This was just a simple plastic bin that had holes drilled in the sides. Kitchen scrapes and shredded paper was layered in the bottom. This one requires a little bit of work, because once you put the worms in and they do their job, you have to fish them out to empty the bin. We then looked at the Worm Factory. It is a stacked composter. As you add waste you add more trays and as the worms eat their way higher you can use the lower trays in your garden or containers. You can also use the overflow fluids from the composter as a liquid fertilizer. The Worm Factory is a great system for small spaces and if used correctly, you can even keep it in the house without worrying about the smell. These worm bins are different than the much larger compost bins that you find in the backyards of people around the area. If you would like to learn more about composting and worm bins stop by either location of Portland Nursery.
Maintaining Ground Covers
People buy ground covers to reduce watering and help fight weeds in their garden, but sometimes the ground covers fail to live up to expectations. To get some tips on ground covers and how to maintain them we stopped by Viscaya Gardens (503-761-7757), William’s nursery on Division Street in Portland. Ground covers are just like every other plant in your garden, if you fail to take care of them during that crucial first year, they will not thrive and grow. At Viscaya the areas under the display tables are different types of ground covers. To help them get established, William looked for plants that could handle the conditions of shade and water under these tables. For some of these ground covers, they needed help with competition from weeds. The first year William had to hand weed the beds and then apply a seed pre-emergent to inhibit the weed growth. You can use a chemical product like Preen or an organic product like corn gluten. Then once they started to grow William would use a weed eater on the taller varieties. This knocked down the plants and forced them to grow outward instead of upward. Now that the plants have a good first year under their belts they have responded to the second season with vigorous growth! If you have questions about your ground covers, stop by your local independent garden center or pay a visit to Viscaya on Division.
|